

If you’ve ever been curious about making your own lard, I can tell you that it’s way easier than you might think – and it makes your baking and cooking so much better. Here’s my experience, step-by-step, on how I rendered my own lard at home!
Where to Start: Sourcing the Fat
The first step is getting some good fat. I bought pork leaf fat from a local butcher. If you’re wondering there are three kinds of fat on a pig: back fat, belly fat (which becomes bacon), and leaf fat (which surrounds the organs). Leaf fat is the best for making lard because it’s cleaner and has less of that porky flavor, making it ideal for baking.
Getting It Ready for Rendering
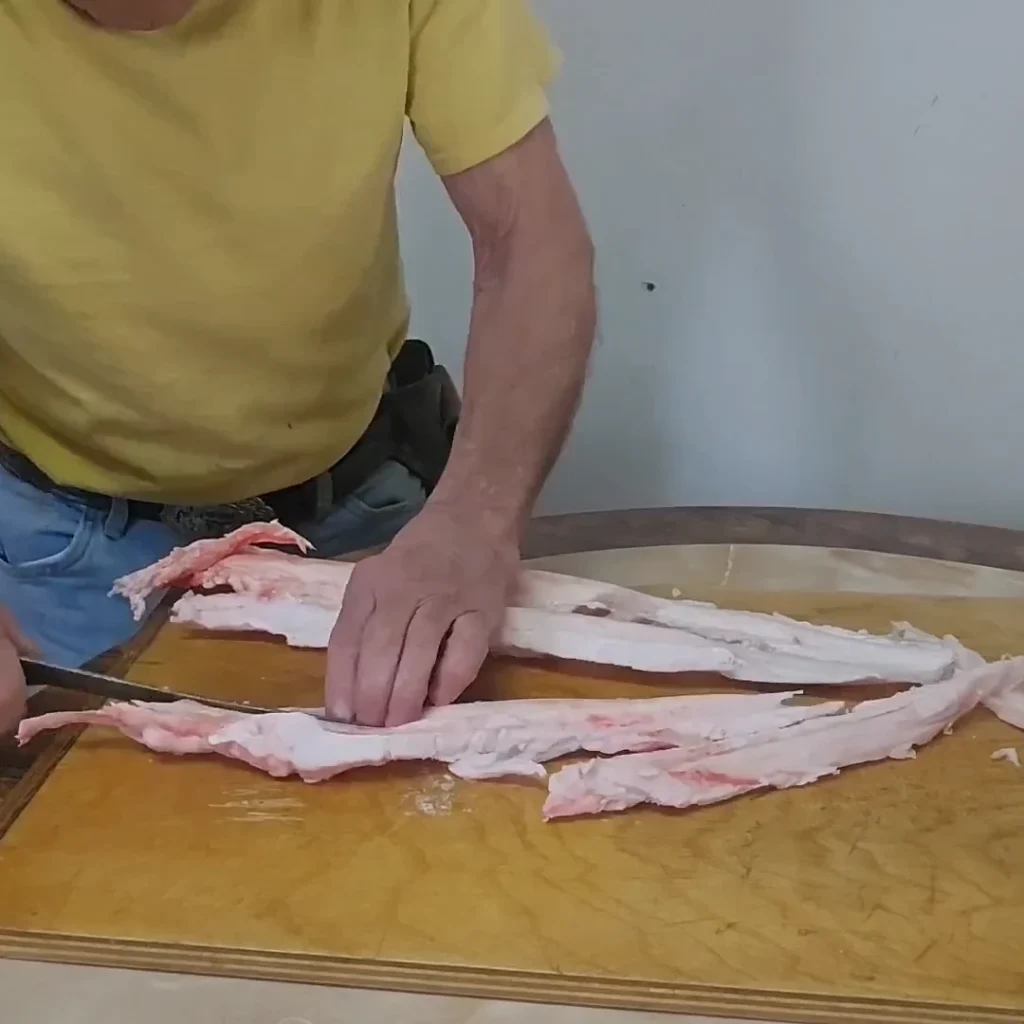
Before starting, I slightly froze the fat to make it easier to handle. Remove as much non-fat material as possible, but don’t stress over small bits. Initially, I planned to grind the fat, but the silver skin kept clogging the grinder. Freezing it more and cutting it smaller might have helped, but instead, I opted to remove as much silver skin as possible and chop it by hand.
The Great Dilemma: Stove or Slow Cooker?

Once I had the fat chopped, I realized I had too much for my slow cooker. My choices were either to do it in batches or use my stove top. I decided on the stove, opting for a 3-gallon pot. I added a bit of water to the pot to prevent burning and then added the fat. After some experimenting, I figured out that my stove worked best on a medium-low heat (about the 9 o’clock position on my dial). I stirred the fat about once every 30 minutes to keep it from burning.
The Rendering Process
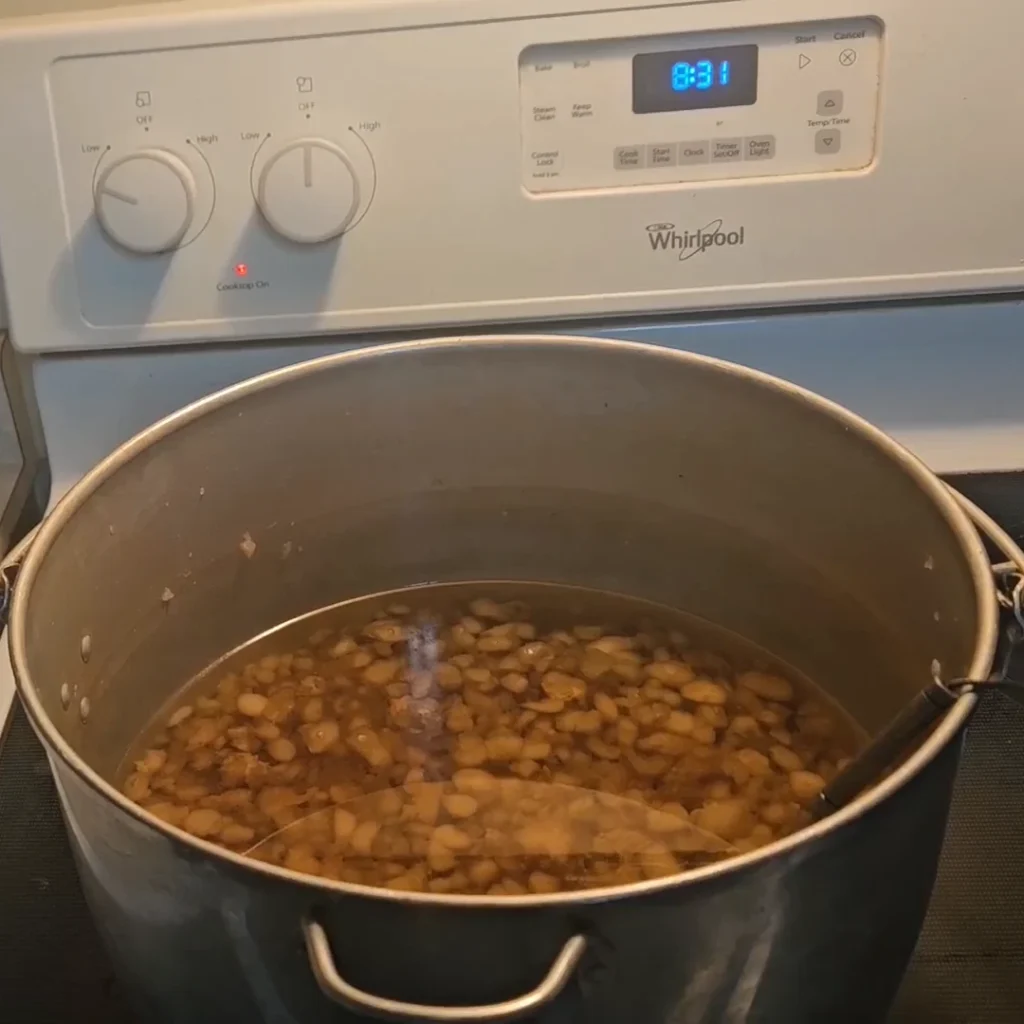
As the fat rendered I noticed little bubbles forming, which was a sign that the water was evaporating – exactly what I wanted! The fat gradually started turning a golden brown, and the cracklings (the crispy bits) began to form and sink to the bottom. That was my sign the that the rendering was done.
Straining and Storing the Lard
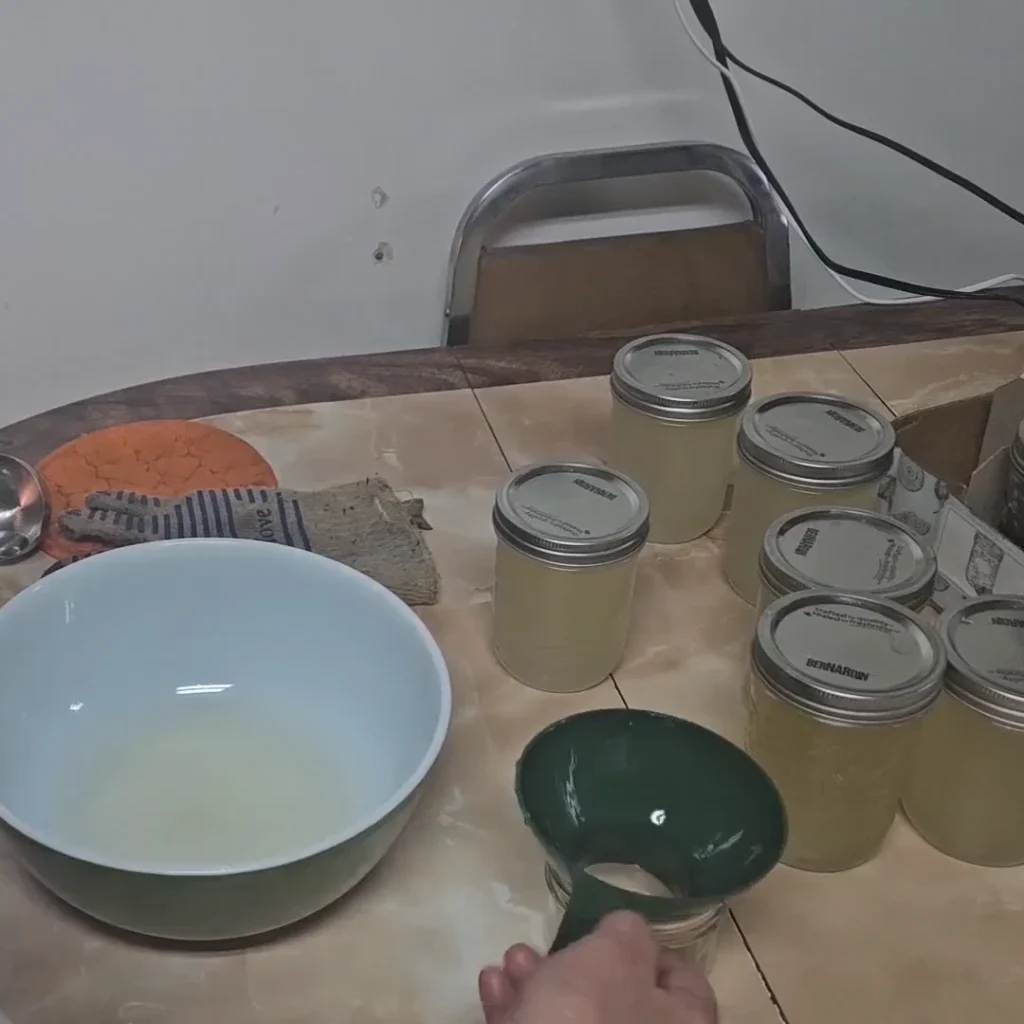
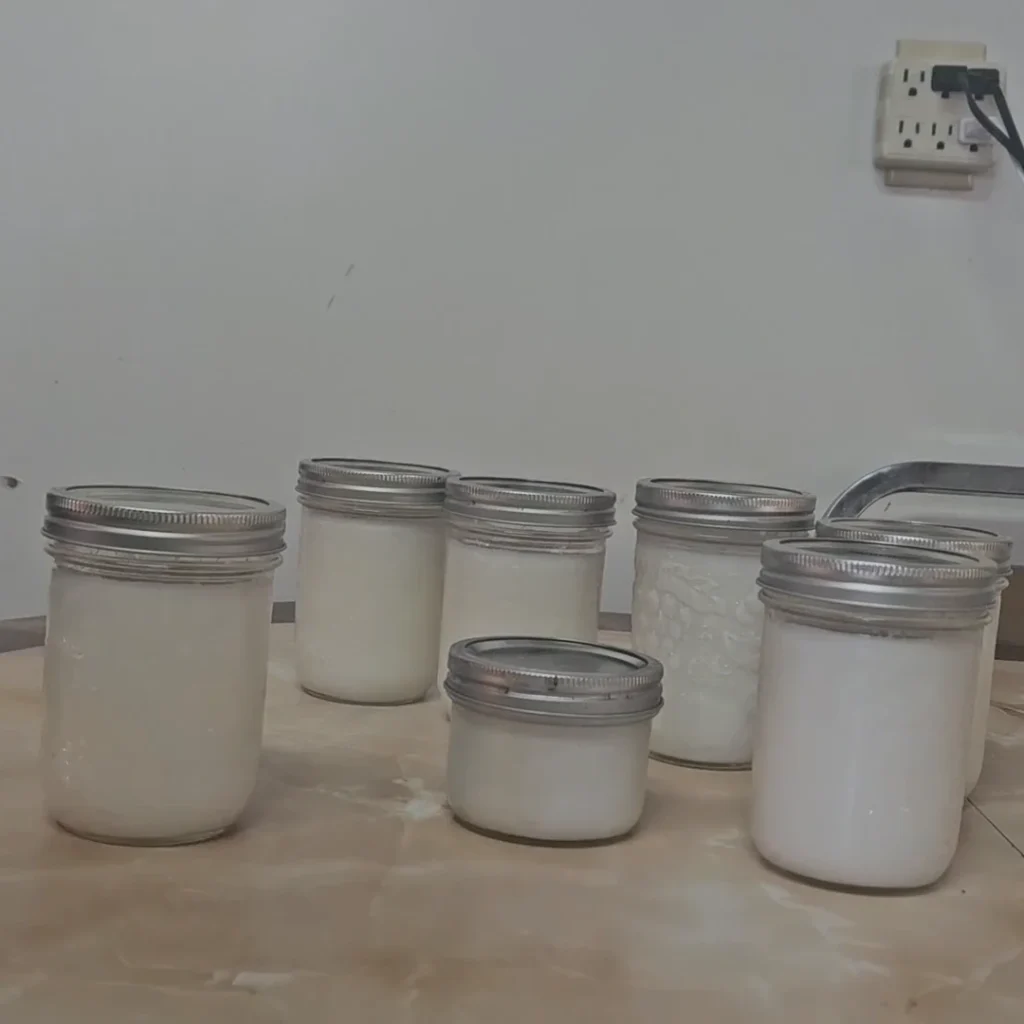
Once everything was done, I strained the lard into a bowl and then poured it into ½ pint glass jars, leaving about ¾” of head space to ensure a good seal. I wiped the rims with vinegar (a trick I learned from canning) and finger tightened the lids. After letting them cool overnight, the lard turned a beautiful white color, and all but one jar sealed perfectly. I’ll use that one first.
How to Store Your Lard
I’m storing my jars of lard downstairs in my cool pantry, and from what I’ve read, properly sealed lard is good for a year. Once opened, it should last a few months on the counter top. If it goes rancid, you’ll be able to tell by the smell, so it’s easy to keep track of.
The Final Verdict
I’m happy with how the lard turned out. It’s clean, white, and smells amazing (or, rather, doesn’t smell like pork at all). Now I’m ready to use it in baking, frying, or even cooking. The best part? I did it all myself! Now, I just need to figure out how to make the perfect pie crust.
A Beginner’s Guide to Rendering Lard
Curious about making your own lard? It’s easier than you think, and the result is a clean, mild fat perfect for baking, frying, or cooking. Here’s a step-by-step guide from my own experience rendering lard at home.
Ingredients
- 5–10 lbs pork leaf fat
- ¼ cup water (to prevent scorching)
Instructions
- Slightly freeze the pork fat to make it easier to cut.
- Remove large pieces of silver skin and any non-fat material.
- Chop the fat into small, even pieces.
- Place chopped fat into a large, heavy-bottomed pot and add water.
- Set stove to medium-low heat and stir every 20–30 minutes.
- Allow fat to render slowly; bubbles indicate water evaporation.
- When cracklings turn golden and sink, the lard is done.
- Strain liquid lard into jars, wipe rims with vinegar, seal, and let cool.
Notes & Tips
Leaf fat is ideal for baking because it’s cleaner and milder. Small bits of silver skin won’t affect the lard, but removing as much as possible helps it stay smooth.
Storage
Properly sealed lard can be stored in a cool pantry for up to one year. Once opened, use within a few months. Rancid lard has a noticeable sour smell.
Print RecipeFrequently Asked Questions
What is the best fat for rendering lard?
Pork leaf fat is the best choice because it produces a clean, mild lard ideal for baking.
Do I need a slow cooker to render lard?
No, a stovetop works perfectly. Just use low heat and a heavy-bottomed pot.
Why do you add water when rendering lard?
A small amount of water prevents the fat from scorching at the start. It evaporates as the lard renders.
How do I know when lard is fully rendered?
When the cracklings are golden and sink to the bottom, the lard is done.
How long does homemade lard last?
Sealed jars can last up to a year. Once opened, use within a few months.

Leave a Reply